After you install the Genesis Framework and you have decided on a theme, it’s time to customize the theme plus make use of the internal author box feature. In this guide, I am going to show you how to set up the author box and let you know how you can use it elsewhere on your blog.
- Also Read: How To Add A Gravatar To Your WordPress Blog
It is crucial that you add a gravatar to your email address that you have listed in your profile on your blog for the author box to look more professional with an image attached to your name. I have seen too many blogs not making use of the free gravatar feature, so I had to blog about it. Because some people, when commenting on WPOutcast, still did not set up a gravatar image, I changed the default one to a Default Comment Avatar just for looks.
Follow the steps below to learn how to set up the author box and make use of it elsewhere on your blog.
What Is the Author Box?

The author box displays who the author is and the ability to add a brief description about yourself and who you represent. You can even add links. So let’s get started.
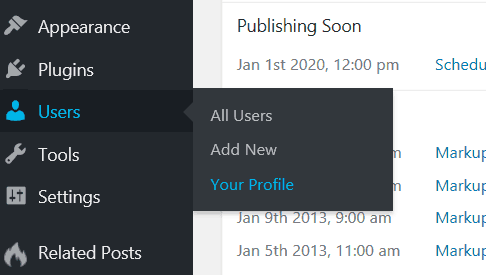
Edit User Profile

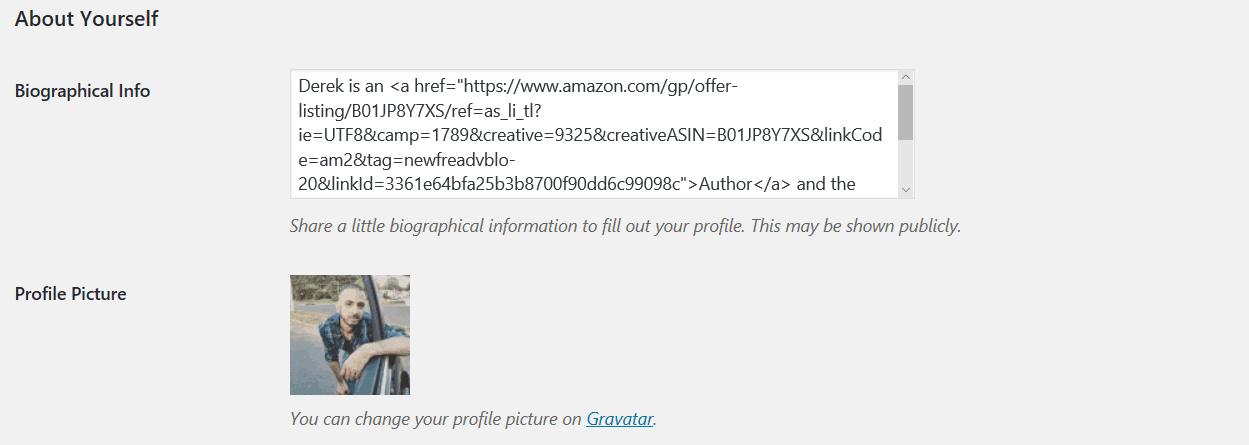
Once on your profile page, scroll all the way down to the About Yourself section so you can write the description that will be used ultimately for the author resource box. Notice the gravatar image appearing. If none appears then you need to create one on gravatar.com like I mentioned earlier in this blog post. Here is an example all filled out.

Typically 2 to 3 sentences is more than enough for the description. It’s also important to add a social link or two, even to a product you have. For example, I wrote a book that was published so I linked to it. Short and sweet should be what you should write. Let people know who you are for example or why they should listen to you in a short bio. Stay on your profile page before saving it as we have more to go over.
Adding The Bio To The Blog
The next step is now to add this bio that you just created to your blog. This bio will appear on all the blog posts that you write and not on the blog page itself. It’s designed this way. Continue to scroll down till you end up at the following section in the image below.

I never list the author box on the user archive as it’s just useless from an SEO point of view. When people look at your user archive, they obviously know who you are and want to read more of what you have written. After you make this change, save the changes in your profile and then you are done enabling the author resource box that is a built in feature with the Genesis Framework.
Add Author Box To The Sidebar
In case you want to add your bio in the sidebar for whatever reason, you can easily do this with a built-in widget. In your appearance–>Widgets section, just pull a widget over to your sidebar.

Here is how to set this widget up.

The other options are for this widget.

Save changes when done. View your blog to see the widget in the sidebar which depends on where you placed the widget at. You can even add this widget in your footer widget section instead. This is an optional widget to use on your blog. Double check your author resource box appears under your blog post.
The widget should generally look like this.

If people join your blog and write guest blog posts, make sure they enable their author resource box in their profile or you can do that manually so they have one attached to their blog posts.
If this tutorial has been helpful, consider sharing it online with your followers.

nice article :)
very good article. Thanks for sharing
Hi Derek,
Very good article,
Thanks for shareing, keep up the good word.
thank you very much for the info, i have wp website and how to connect with the blog and do you think if i write continuously new article in the blog it works to promote my website? Typically 2 to 3 sentences is more than enough for the description?? It’s also important to add a social link or two, even to a product you have.
Nice article Derek,
Keep it up,
Thanks for sharing.
Hi Derek,
Very good article,
Thanks for sharing, keep up the good word.
Hi,
Very good article Derek,
Thanks for sharing, keep up the good word.