You may be losing out on traffic in the social media world by not sharing your old content. If you run your blog like WPOutcast, where old blog posts and pages are updated throughout the month, how are you telling your followers that the posts have been updated? You could manually share each post or page, but why waste this time if you don’t have to. By using the Revive Old Post plugin, you can automate this action, giving you extra time to devote elsewhere in your blog. That is the free version of the plugin, but there is also a pro version.
This guide is a walk through on setting up this plugin to automate your content being shared to Twitter, Facebook, LinkedIn, Tumblr, and Xing. I don’t have accounts for all of these platforms, but this walk through will make it easy to understand the setting for any of the social media sites available. I will be using Revive Pro for this tutorial, which is the pro version of the plugin. It is a yearly membership fee that is definitely worth it.
Installing The Plugin
Go to your Plugins page and click on add new since we are installing a new plugin. Type the following into the search box:

After you install the plugin, you can begin editing the settings and customize it to your needs. Since I am using the Pro Version, I’ll mention what we had to do to get this working. After the purchase, I logged into my account and changed the default password. Then I uploaded the download to my blog. You will have two copies of the plugin to upload, the free and paid version. You need to upload both of these to have the plugin working properly. You’ll know why when I post the screenshots of the settings page.
Obviously, the pro version has move features and customization setting than the free version. I opted for the paid version because it really allows me to control everything about the automation process, whereas the free version is a little limited.
In admin dashboard you will have to navigate to general –> settings and enter your license number.

In your Revive Account, your license key is available to copy and paste it into your WordPress dashboard page.

Customizing The Settings
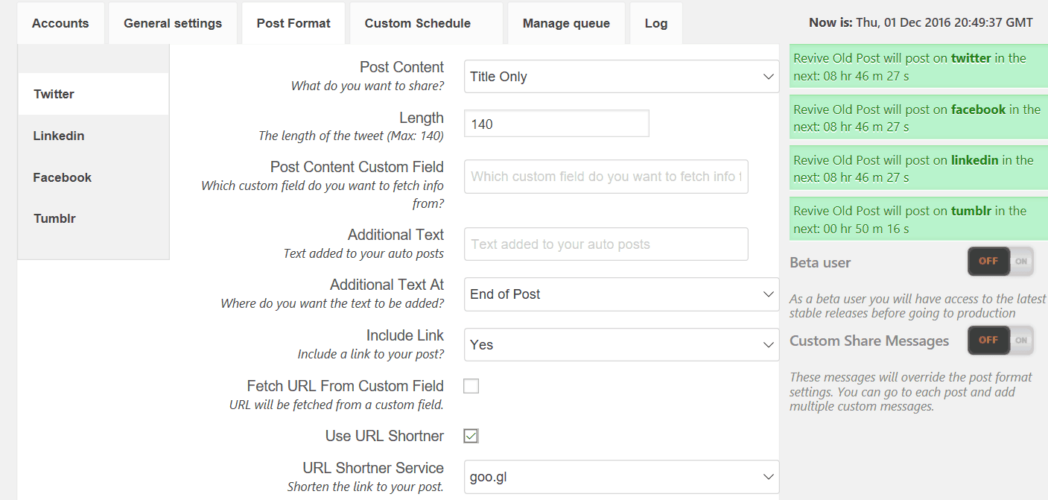
In your admin dashboard, navigate to the settings page. Here is what I have used for my settings with the pro version.

Next tab:

The third tab has custom settings for Twitter, Facebook and LinkedIn.

The fourth tab is where you set the time span for when you share old blog posts to your social media accounts. I have set this to every 15 hours. This is great because If I don’t publish a blog post one day, I know this blog’s content will get shared every 15 hours till I publish a new blog post.

The next section is managing the que of blog posts and/or pages to be shared automatically. This page tells you the times they will be sent based on your scheduling settings. You can even delete and edit posts and pages from this que. The Pro version is worth the price tag.

A feature I like is the exclude posts feature. There are certain pages or posts that I just don’t want in the que to be reshared over and over again but still have them indexed in the search engines. Just put a checkmark on the posts and click the exclude button.

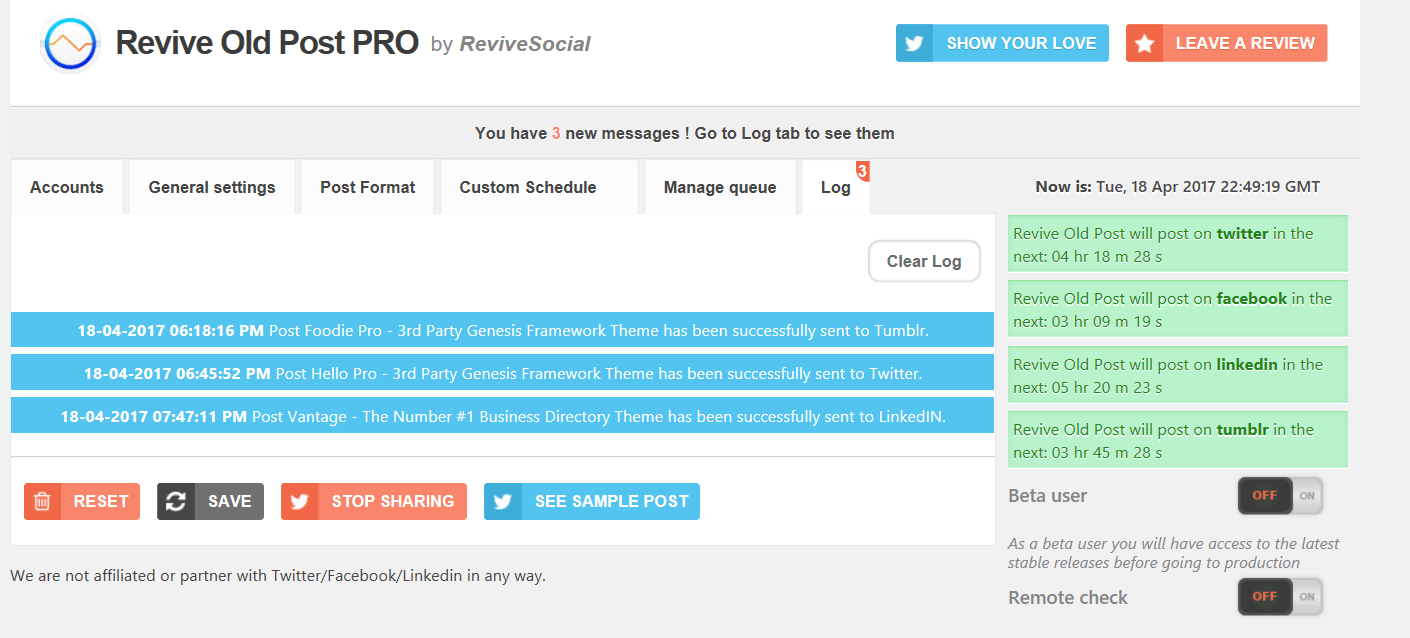
My favorite setting is the log feature. This section will show what blog posts was submitted to what social media accounts that you set up and the time they were published. Also if there was an error when sharing a blog post or page, it will show the error in this log. If you do get an error, email the support team. Every time I notice a posting error, I reach out to the support team and they are able to correct the issue. Most times it’s on that one social networks end and we just have to wait it out.

Final Thoughts
The Revive Old Post free plugin is a great plugin. Unfortunately, after installing the plugin and configuring the features, you might realize there is a setting you would love to use that is only available in the pro version. Another premium plugin that WPOutcast has been using for a while is the Monarch Social Sharing Plugin. There is a yearly membership to sign up and use this plugin, but in my opinion, it is a good investment.
- Next Up To Read: 7 Quick Tips About Creating Blogging Goals
If this blog post has helped you in any way, consider sharing it with your followers.

Leave a Reply