Have you tried to use yearly billed third party plugins, such as Adsanity, to sell banner ads? Maybe you have applied multiple times to BuySellAds, but keep getting rejected. I have a simple, all-in-one solution for your troubles; OIO Publisher plugin for WordPress. It’s an affordable one-time payment that includes a lifetime of updates and support. You can’t get any better than that. I started using this plugin when it was a beta program, and still love it today!
Notable Features
With this software, you can sell banner space, text links, inline ad space, as well as sponsored reviews and posts, all from your settings dashboard in your WordPress blog. There are no hidden fees, and you keep 100% of the profits, unlike some other advertising plugins and 3rd party advertising companies. This is why OIO Publisher is my only choice for selling advertising space.
Custom Charging Modules
You have control of the charging module and pricing, which is shown below. This example will be for an ad space in the sidebar (I will show you the final product in a moment). In the image below, the left column is the $x.xx price and the right column is how many days you set for the banner image to show.

Custom Size’s & Amount Of Blocks
Depending on your theme design and layout, you can use custom image sizes for these spaces. These sizes will be mentioned on the purchasing page so the potential buyer will know what size to make his or her image.

Advanced Settings
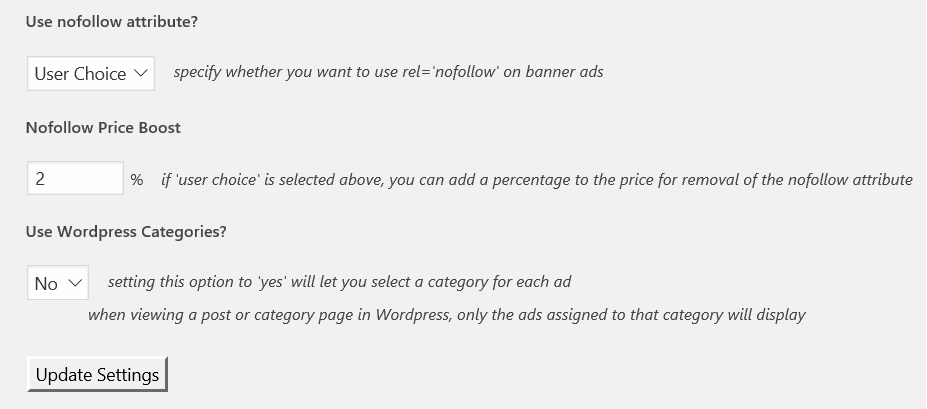
Here is where the best settings are, though some require a little extra thought. We won’t be going over these settings in-depth, as this walk-through is about showcasing the easy setup of this plugin. However, I do encourage you to try out some of these advanced features to find what best fits your needs.

Here are even more settings that allow you to squeeze a little more cash out of advertisers, which is always a plus.

The next slot to use is for exchanging links. This feature can be simplified in one sentence; you are trading your ad space for your link being on their site. I personally believe this is an outdated marketing technique, and advise that you don’t use it.
Now, let’s get to the last section to modify before your banner advertisement goes live.
Default Ads
Obviously, you might not have an advertiser the second your advertising spaces go live on your blog. You’re going to want to add some images into those spaces so it appears you already have advertisers. Don’t worry, this won’t scare away any new potential advertisers. For WPoutcast, I use my affiliate links and images, which I feel is the right thing to do.

Save and verify all settings for your banner ads. In the future, you only have to edit this one ad zone if you wish to change the price or days. This section shouldn’t be touched unless prices or days are being adjusted.
Integrate Payment Methods
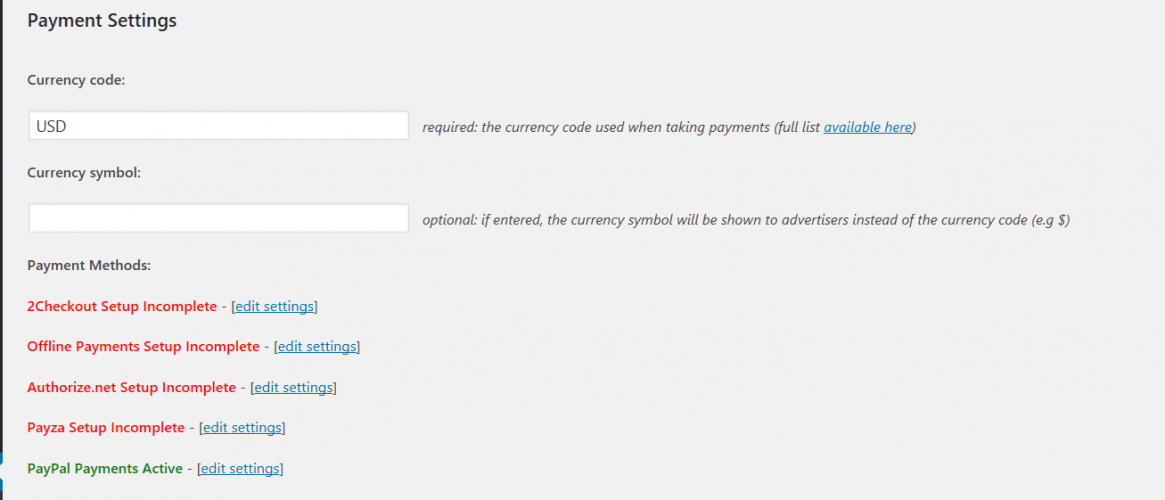
Before we go any further, I’d like to show you the available payment options you can enable for your potential buyers. Keep in mind that in some countries, PayPal is available, so OIO Publisher has added a few different payment options.

Last section which is what I like is the advanced payment section:

- Recommended Tutorial: How To Secure A WordPress Blog
The OIO Publisher Sidebar Widget
Now that the payment and settings have been saved for your banner ad, you are ready to add the advertising space into the sidebar. This will be the space that you sell to advertisers.
In Appearance —-> Widget’s
You’ll notice several OIO Publisher widgets, but you only need to use one to match the example shown in the second image below. Drag the OIO Ad Zone widget to your sidebar and edit a few things before saving.

Example of the side bar ads:

Purchase & Payment Page
When someone clicks on the advertise here block, the following payment page comes up for them to fill out and send the payment. Modify your setting so that the advertisement will not appear until you approve it. This allows you to verify payment before the ad goes live.

This is just a basic guide on setting up an advertising section. This plugin has a lot to offer, and remember, you keep 100% of all purchases made through your payment gateway account. There is no middleman with this plugin and that’s why I recommend OIO Publisher.
If you really enjoyed this blog post, please consider sharing it with your followers.

Leave a Reply