
Do you have one of the many free email opt-in plugins that can be found either in the WordPress plugin directory or on other 3rd party plugin websites? Do you think that plugin you are currently using could use a little more features or better statistics? Just over a week ago, I installed the Bloom eMail opt-in plugin and already loving it because of its features and it’s easy to set up.
In this blog post, I’m going to discuss the Bloom plugin and the amazing features it comes with. It’s well worth the $89 per year price tag. Bloom does all the hard work for you, you just have to edit all the settings in your options panel to have a form up in no time.
Bloom – The Initial Set Up
After you purchase the Bloom eMail Plugin, you will be emailed a .zip file. Upload the plugin to your themes directory and activate it. Once you activate it, you will need to edit the settings to start noticing a change on your blog.
Let’s go ahead and attach one of your autoresponder contact lists to the bloom plugin. Some of the oldest companies are already added into the Bloom Plugin such as aWeber, MailChimp and Feedblitz. See below for the whole list. (NEW – 4/25/2017 3 new email providers added. ConvertKit, MailerLite and Mailster)

In your admin dashboard, click on the “optin-forms” link because you need to add an opt-in form to your blog if you want an autoresponder box. I hope you deleted any previous opt-in form plugins because you don’t need it anymore.

Now click on the “new opt-in” button to begin the whole integrating process (image is below). This next pop-up window is very important to you. Choose the location you want the form to show at. If you want one for the blog itself and one for the widget section, all you have to do is follow the same steps in this tutorial to create a new form but select the “widget” one like I did. Then I went into “Appearance –>Widgets” section and dragged the Bloom widget to the footer widget. Let’s stick with creating a widget for the blog itself.
We will be using the “Fly-In location for this tutorial.

After you click on the “pop-up” location, let the page load to the next screen.
Form Integration
Here we go, you are seconds away from actually designing the whole form. Name your opt-in form as you may create new ones as your blog grows. In the drop-down menu, select your autoresponder provider. If you do not have one, MailChimp offers a free package.

After making your section, it’s time to add your account ID in the next box. Keep in mind this 2nd box will be totally different per autoresponder business. Before this blog post, I already created a newsletter list so it’ll appear in the drop down menu for me like shown below.

Here is the one section I got stuck at for a few minute but figured it out. Below you will see a 3rd drop down menu but if you do not see your opt-in form you created on your official autoresponder website then we will need to backtrack a little. Just hit the save button anyways and select the “inactive” option. If your autoresponder list name is in there then select it and go to the next screen otherwise continue reading on for the troubleshooting steps.

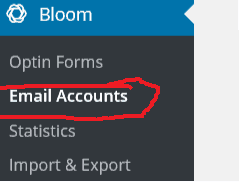
To get your form name in that box, let’s head back to your Bloom menu page and click on the “email accounts” link. Click on the link in the image below again.
If that page is still a blank page, don’t panic, it’s time to refresh that page by clicking on a button and your opt-in form name should appear. If nothing appears, I’d suggest read the Bloom plugin configuration guide. You should be here:

Ok, let’s just go ahead and hit the refresh button that is highlighted in the below image and you should see your form show up. I created my own thank you for subscribing form using my MailChimp account. I’d suggest you read the detailed instructions with the Bloom eMail Plugin before configuring this plugin. I’m just showing you step by step what you will have to do. This could be different for you, but you’ll get an idea what is in store to get a form up.

All mine are up so now let’s show you how you can create a beautiful form.
Let’s go back to the Optins form menu button so we can totally configure our first optin form to use on our blog.

Bloom comes with many form templates to choose from to create the most different form that you will ever create. This plugin is just amazing once you truly explore all the features that are provided. Here is a peak of some form templates.

You should now be on the settings page as shown below. Choose what settings that you want. Remember you can edit these settings at any time if you need to tweak the form even more to suite your taste. I am setting up a widget so my settings show will be a little different.

Notable Features
- 100+ Pre-made Templates
- 3 Opt-In Form Orientations
- Customized Borders & Edges
- Image Orientation Options (add logo inside form)
- Unlimited Color Options
- Target Specific Post Types and Categories
- Target Specific Post Types and Categories
- Conversion and Email List Statistics
WPOutcast’s Favorite Settings Page
The next settings page, I just have to show you a glimpse of it. You can make the form appear in a huge number of ways. Can you do that with your old plugin or that free one you were using earlier?

Don’t forget to watch this video:
- Next Up Next To Read: How To Add A Widget Under The Navigation Bar

If this blog post was helpful to you in any way, please consider sharing it online with your followers.
Leave a Reply