Do you visit blogs online and see people posting code inside their blog post for you to copy and use? Want to know how to post code in a safe way on your blog? Perhaps you are learning how to develop themes and one day may want to share your codes for free online or share a code you found online on with visitors of your blog. The best plugin to post codes on any WordPress blog is the Crayon Syntax Highlighter plugin.
This plugin is a bit confusing if you look at the plugins settings page. In this post, I’ll make it easy for you to follow along. See examples of this plugin in action in this tutorial: 5 Simple Codes To Customize Your Theme After Installation
How To Install The Crayon Syntax Highlighter
Go to your plugins page and click on Add New, then type in the following text into the search box like shown below: (Crayon Syntax Highlighter)
- Detailed tutorial: How To Install WordPress Plugin Through The Admin Dashboard
Hit the enter key to begin the search for the plugin in the WordPress code index. You will then see this plugin in the first box on the left-hand side.

- Tip: Simple Category Customizations For StudioPress Themes (examples of codes in post)
Since I already have this plugin installed, the install button is grayed out. You can now safely install the plugin and then open up a new blog post to post a sample code and see how easy it is.
How To Use The Plugin
This plugin works with many programming languages such as CSS, HTML, PHP and much more. It’s built just for WordPress. There are 2 ways you can enable this feature inside your blog post/page when you want to drop some code. do know that you have a “text” and “visual” mode when you want to write content right? Here is how to use both
Did you know that you have a “text” and “visual” mode when you want to write content right? Here is how to use both versions to post code.
Text Mode
Start off with a blank canvas.

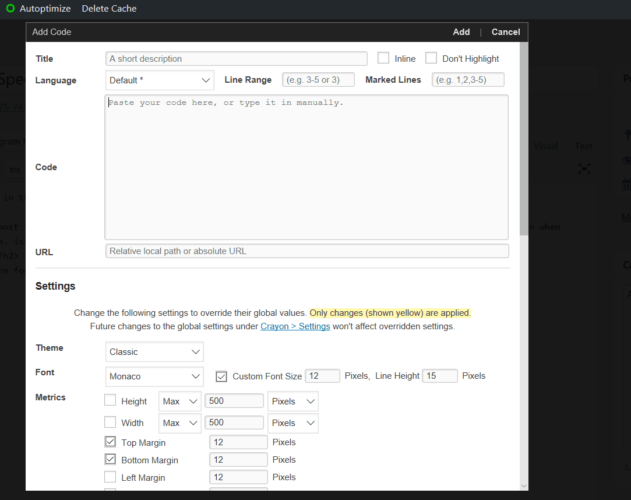
I do hope the image is large enough for you to see what I am doing as a step by step guide this post will be. In the image above, can you see where the “Crayon” text button is? To post a code in a blog post or a page, you would click on the “crayon” button then the following box appears as shown below.

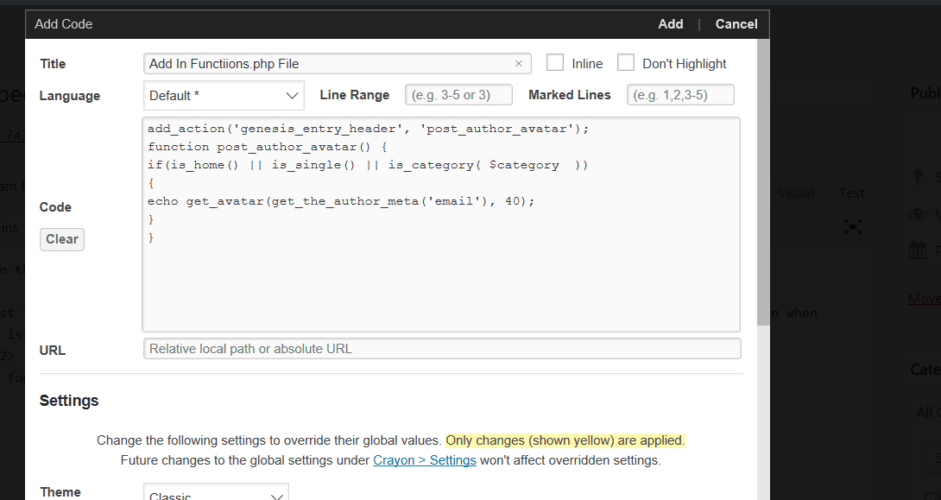
Yes, there are a lot of stuff/features inside that popup but I have never used any of them in my couple of years using this plugin. I just click on the “Crayon” link and paste my code. Look at the screenshot below with the code added.

- Also Read: How To Add A Search Box On Your Blog
After the code is added, all you have to do now is hit the Add Button to add the code into the blog post. Keep in mind that you can then copy the whole code inside the blog post to paste it in the location you want it to be in.

You see the **pre** tags at the beginning and end of the code? Don’t touch these because that’s the actual code that makes your code look like the sample image. Don’t ever type the **pre** codes manually, always use the “Crayon” button so you are adding code the correct way.

Visual Editor
The 2nd way to post code with this plugin is using the visual editor editing window if you prefer to write from that page. It’s relatively the same way as before with a slight twist.
Let’s get started, I will use the same blog post as this example. Click the visual button. I highlighted the button in the below image.

Let’s begin to add another code. Can’t find the “Crayon” button? It’s now an icon. Check out the image below.

Now that you have clicked on that image, you’ll notice the same popup box link in the “Text Editor” page. Like before, just copy your code into the blank box and click on “add”

Once you have clicked on the “Add” button, you’ll see the code inside the blog post/page like so.

You see how nice the code is displayed? Using the visual editor is a safe way to use this plugin when posting codes in your blog post. You have fewer chances to accidentally delete the **pre** code tags you see in the “Text Editor.” Remember, if you mess up your code when you publish it, your visitors will have issues with their blogs. My suggestion would be to use the “visual editor” version when you want to post codes.
- Also Read: Recommended WordPress Hosting For Bloggers
That’s it, that’s how simple it is to post the code with the Crayon Syntax Highlighter. Simple right? I did not show you what to change in the plugin settings page or what to select in the plugin popup box before you drop your code in because it doesn’t matter. The way I showed you will work. Go to my example page I linked earlier in this tutorial and copy the code.
If you have found this tutorial helpful in any way, please consider sharing it online with your followers.

i was bit confused that how to use cryon syntax highlighter plugin because of there too muchh options, but after read this post i totally understand how to use it. thanks friend.
I was confused myself but I wrote about how simple it is to use. I don’t need all those fancy options
Why all code show on uppercase ?
in post all code arround the plugin show in uppercase format, why?
So many WordPress plugins seem to be either non-functional or poorly documented. Thanks for a short and to the point explanation of how to get up and running with this plugin. Maybe you should collaborate with the plugin authors to get some of these bad boys better documented.
Thank you. This was helpful! Will post your link on my website.